zondag 28 mei 2017

Filling the Racal Cougar Crypto Keys using an Arduino Part I


After being able to fill the Racal Cougar with custom channel frequencies using an Arduino the next step was being able to add new crypto keys using an Arduino also.


After spending a couple of days doing some reverse engineering using both a C and G MA7083 fill gun filled with known keys i was able to write a little Arduino Sketch that recorded the PWM modulation being send over the F-pin of the audio/fill connector.

At first the data stream didn't make any sense but after looking at it using a scope i noticed why the grabbed data looked like garbage and i had to change the grabber sketch to show the correct data.

Reading both tech manuals for both the programmer and a 4515 i got some info on the commands needed to be executed to do a key-fill and these were quickly identified in the datastream. The 'difficult' part was the key-data datastream and CRC checksum used.

In the movie at the top of this post you can see me changing and testing the Crypto Keys of two Racal Cougars.

Next post(s) will be about the commands and key-data datastream used.


maandag 22 mei 2017

Racal Cougar Standalone Programmer - Part 2

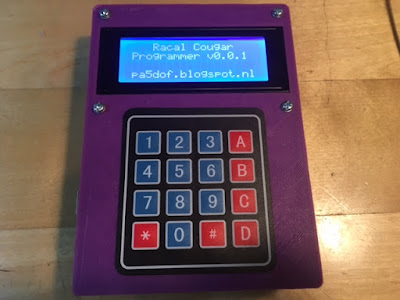
After playing with the initial version of the Arduino Racal Cougar standalone Programmer i decided i didn't like the cheap stick-on 4x4 keypad used so i replaced it with a different one. After make a new 3D model of the case and printing it this is the result:

Version 2 of the standalone programmer

Wonder what's inside it ? Besides a 4x20 LCD, Arduino Nano and a 4x4 keypad there is also a 3.7 volt 1200 m.a.h rechargeable battery with a Adafruit charger/ booster inside the case.

Inside the programmer


Programmer in action:


Besides working on the hardware i also completed the Arduino Sketch making the programmer fully functional and able to program the PRM-4515. 

An introduction and programming a cougar using the programmer can be seen in this video:


Used components:


I used the following components in this programmer. Please note that the provided links are displayed for  reference purposes and i am not affiliated to both shops.
Besides the component mentioned above i also used some items you probably have in your spare box:

  • DB9 female connector + mounting screws
  • Small power switch 
  • Power adapter  9 - 12v DC + chasis connector 
  • 2N7000 N-Channel mosfet
  • 10K resistor


dinsdag 16 mei 2017

Racal Cougar Standalone Programmer - Part 1

After completing the first version of the Racal Cougar Programmer i decided to make a standalone version of this programmer.

This post is a little sneak preview of this project i am currently working on.

 Development version of programmer with 4x20 LCD and keypad.
After collecting the required parts like an Arduino, 4x20 LCD, 4x4 keypad and rechargeable battery i started working on the user interface and menu. This was taking longer as expecting mainly because the existing menu libraries didn't fit my needs so i needed to write my own menu code.

At this moment the menu and user interface are complete, all features of the programmer can be controlled using the keypad and all what is left to do at software level is copying the code which is handling the actual programming  from the original programmer and execute it when the program menu option is selected.

The hardware displayed on the picture is a 3D printed case i made with the purpose of keeping all parts together while writing the Arduino code.

Development version inside view.

As you can see on thee picture it is missing some essential parts like a bottom and parts like the rechargeable battery and controller are just tossed in there.

So on the Hardware part there is still a lot to do and this will be next on my to do list.

Programmer in action:


If you are in a hurry and looking for a working solution to program your Racal Cougar PRM4515 check this post were you can find the schematic and a linkt to the Arduino sketch of my console-based programmer using an Arduino.